
Within OpsMate AI, knowledge collections are used to group data sources (such as Sharepoint connections) for usage by Agents. Collections are required when configuring and creating AI agents as this provide the scope of data/knowledge that the agent starts with.
A knowledge collection is intended to provide flexibility to align to your use case, and allow you to organize your datasource knowledge/files into logical groups as you scale. Some things to consider when setting up collections:
-
A collection can currently only have data source, but the platform will incorporate multiple datasources in the future.
-
A collection can be configured to be available to all users within your instance of OpsMate AI, or private. If set to private, the collection will only be available to you.
-
Provide clear and concise names and descriptions to allow for re-use across your agents and users.
Browse all Collections
Please click the Collections menu on the left side of the system, and a list page of knowledge collections will appear on the right, as shown in the following image:
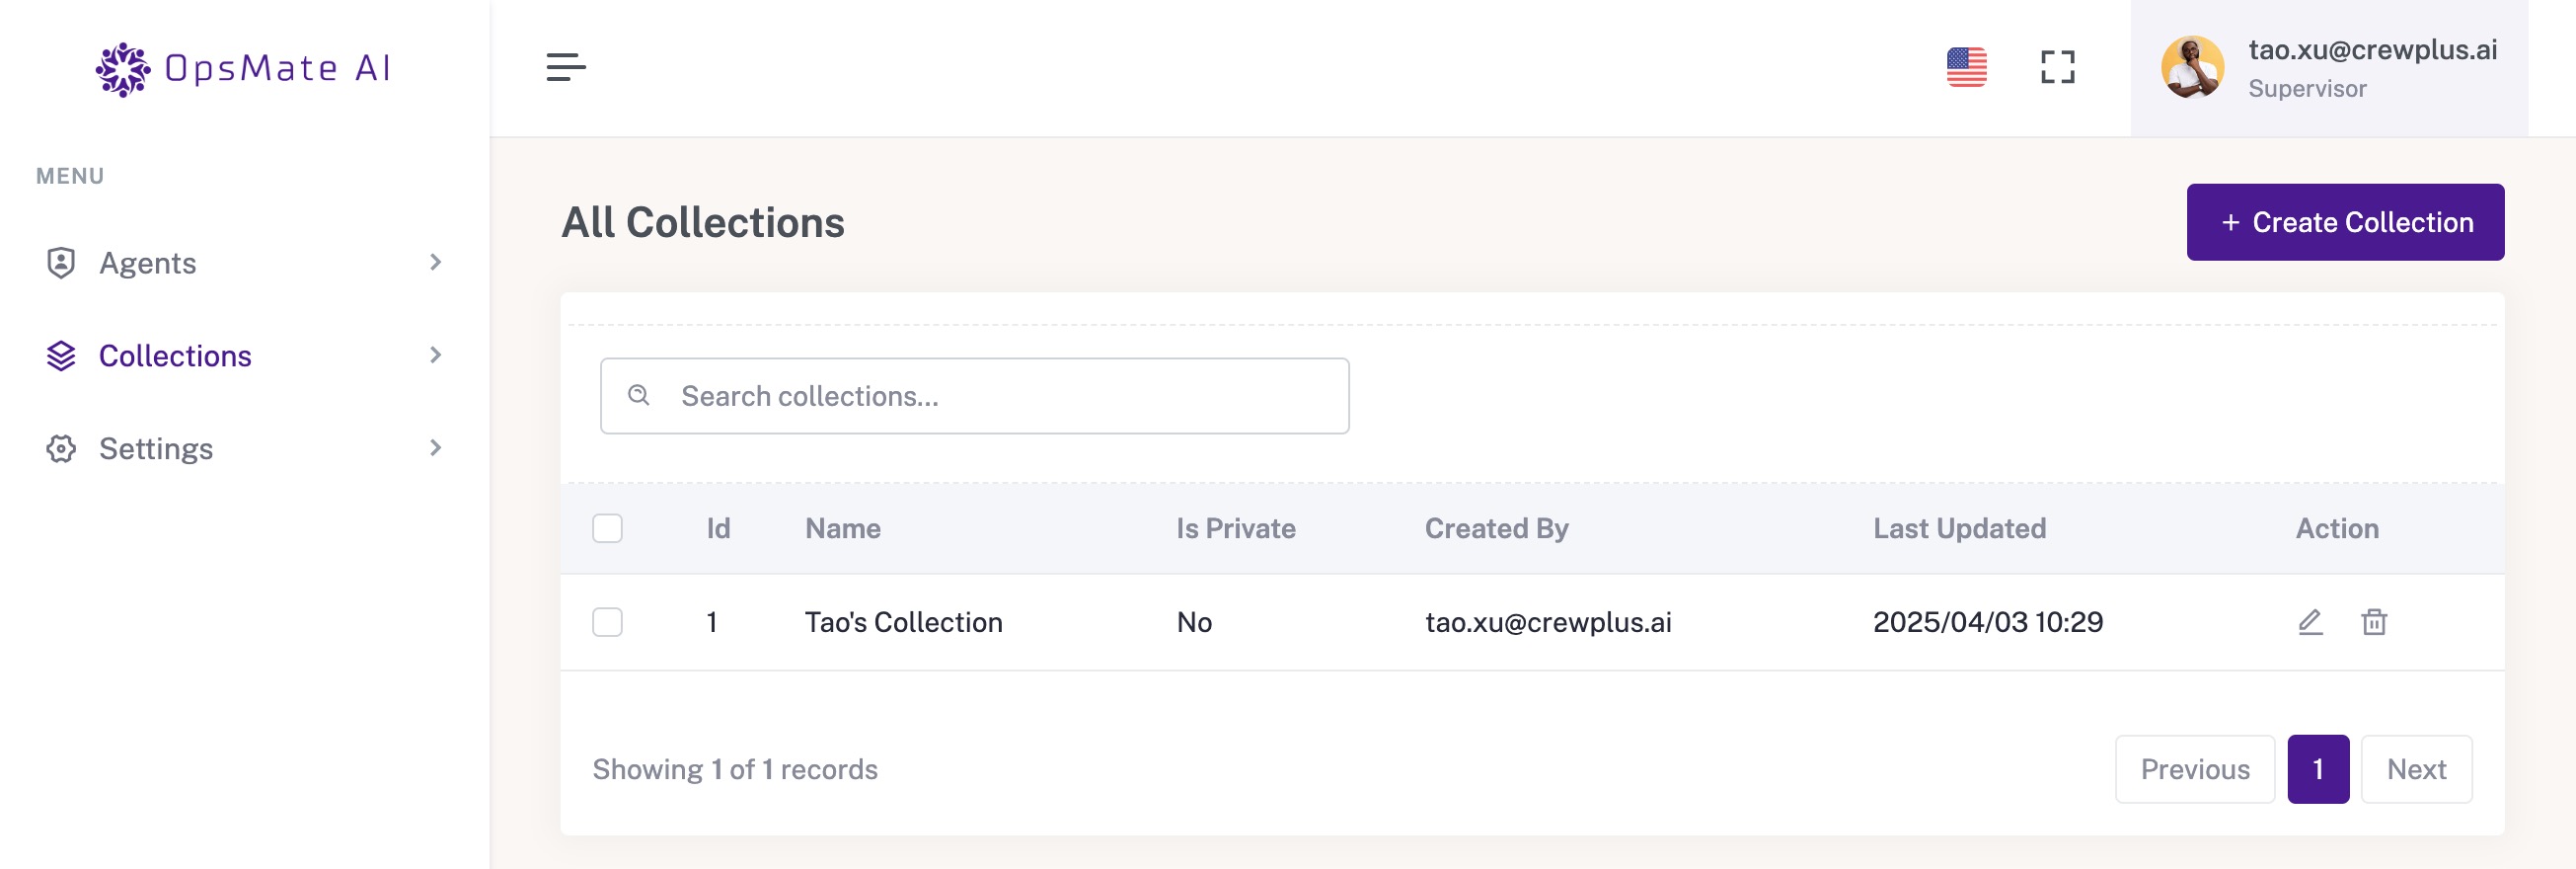
On this page, you can create a new knowledge collection or manage existing knowledge collections.
Create a new knowledge collection
Click the “Create Collection” button in the upper right corner, and the system will pop up a window prompting you to fill in information related to the knowledge collection. Then, click the “Add Collection” button to create a new knowledge collection. For details of the pop-up window, see the figure below:
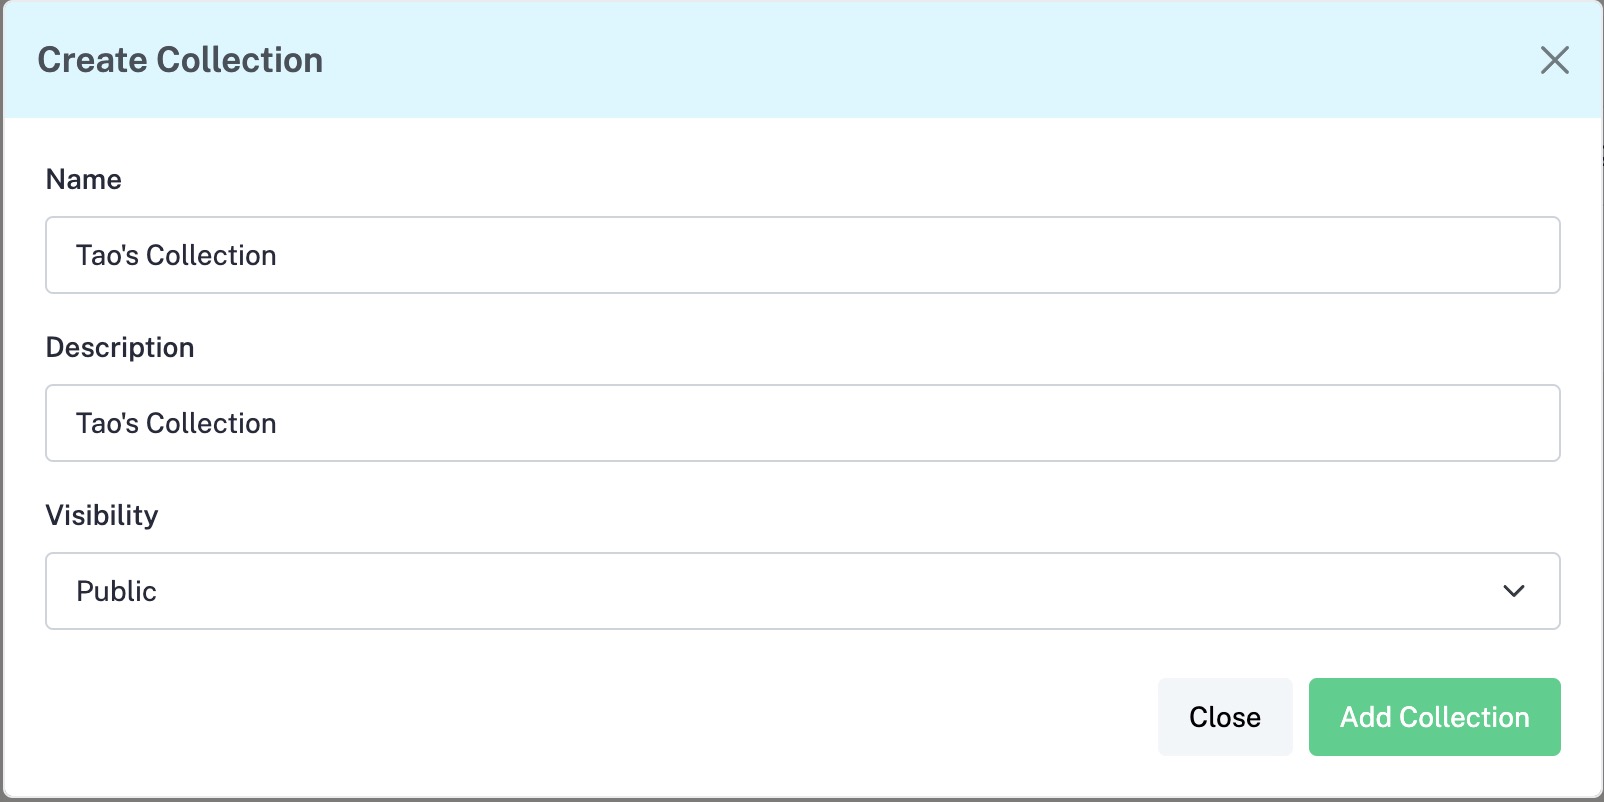
Please pay attention: For the Visibility option, if you choose Public, then all users can see the collection you created. If you choose Private, then only you and the users you specify can see the collection you created.
After completing the creation, the system will automatically redirect to the details page of this collection, defaulting to the Data Sources tab. In this tab, you can add previously authorized data sources, such as a SharePoint data source. See the specific page in the image below:
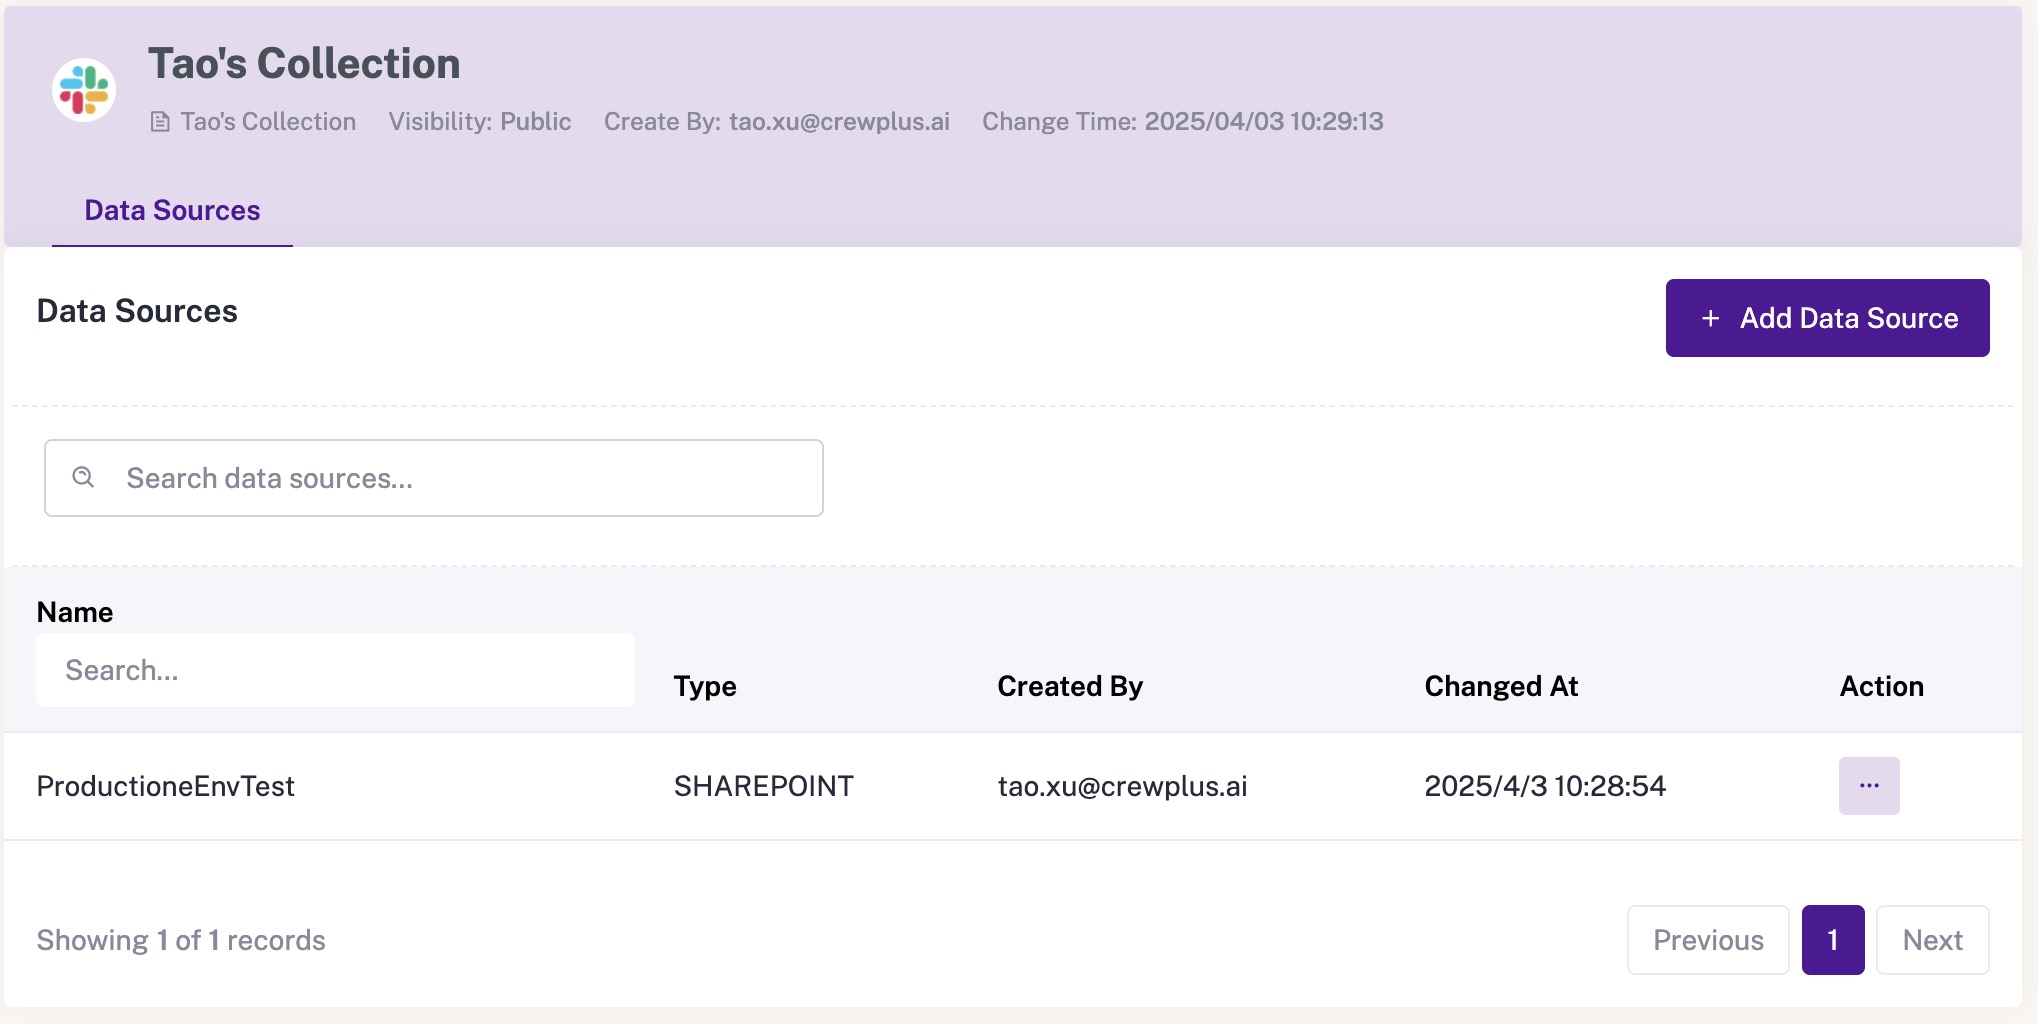
Click the Add Data Source button in the top right corner, and a pop-up window will appear, allowing you to select an authorized data source. After making your selection, click the Add button in the bottom right corner to complete the addition of the data source. The page will then display the data source you just added.
Please pay attention: Currently, the system only supports adding one data source, and in the future, the ability to add multiple data sources will be available.
If you want to delete a data source that has already been added, you can click the … button in the Action column of the table for that data source row. A dropdown menu will appear, and there is a Delete button inside. After clicking it, you can remove this data source from the current collection. After deletion, you can use the aforementioned method to re-add the data source.
Please pay attention: The data source is crucial; without it, the collection holds no knowledge, and inferences made within this collection cannot be guaranteed for accuracy. Please ensure to add the corresponding data source before using the collection for inference.
Edit and Delete Collection
Please return to the list page of the collection. There are two buttons on the far right of each existing collection record, as shown in the image below.
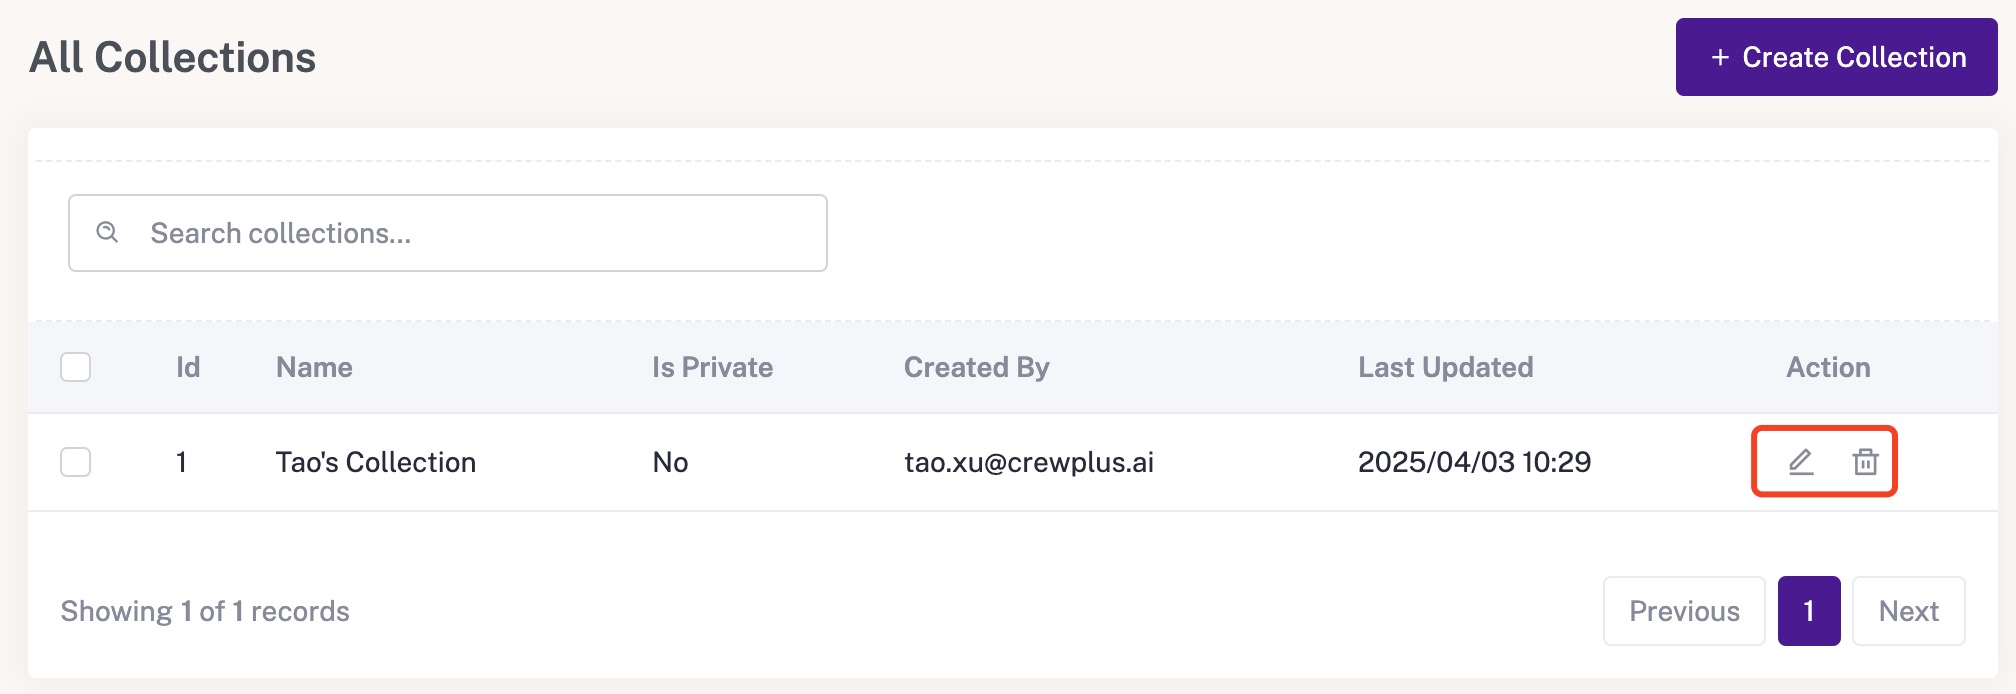
The first button is the edit button. After clicking it, a popup will appear, allowing you to modify the collection’s name, description, and visibility. Then, click the Update Collection button to complete the changes.
The second button is the delete button. After clicking it, a pop-up window will appear asking the user to confirm the deletion. Once the user clicks the confirm delete button, the collection will be deleted.
Please pay attention: If a collection is used by an Agent, it cannot be deleted. Only after removing these references can the collection be deleted.